
Okay, I know the Fairwater isn’t the first step in the assembly instructions for the Revell model kit. But I’m a Submariner. And we are referred to as Pirates. So I treat instructions like the Pirate Code: they’re more like guidelines than actual rules!
At any rate, it’s easier to get the fairwater built first before installing it on the model. Besides, this is the area that will require more custom building, and I’m excited about the customization I will be doing.
First, I have downloaded and expanded a couple of pictures of the USS Lapon for the configuration I’m modeling.
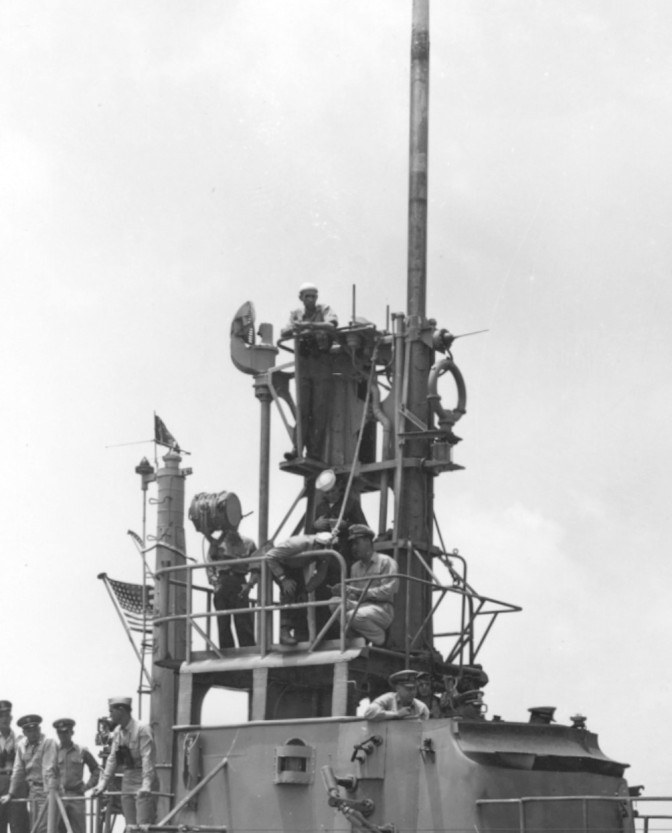
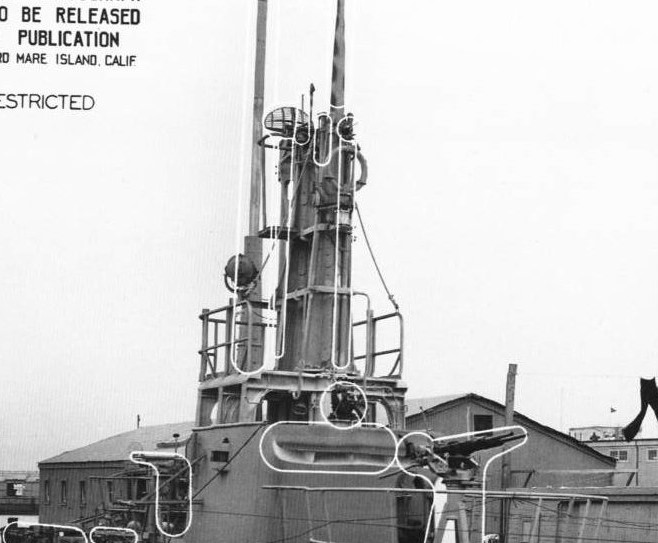
Several modifications will need to be done to accurately reflect the boat. One major modification is moving the SJ Radar mast aft of the periscopes. Now, since the Nautilus Models mod requires the use of the kit periscope parts, I would need to do some cutting on the plastic and glue the mast on to the back. Not really a hard thing to do, but I felt it would be better to just build the Periscope shear assembly using the White Ensign kit.

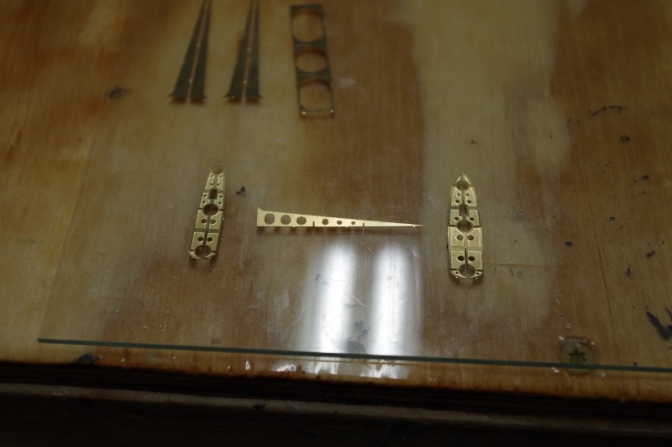
The WE PE set includes the I-Beam parts to build the covered wagon, but I’ve chosen to use the resin parts from NM. After carefully reading the instructions for the PE set, I was pleased to learn that WE included provisions for the exact modification I was looking for.
They have included a rear brace for the aft periscope. The instructions say to trim the two cross braces to allow for just the two periscopes.
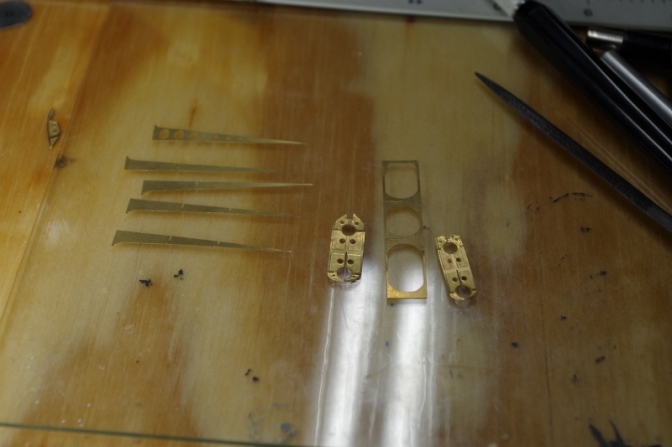
Here, I’ve trimmed the two cross pieces (more trimming will be done as I glue the pieces together). I glue them up on the middle frame, and set it aside while I trim up the Shear Braces.
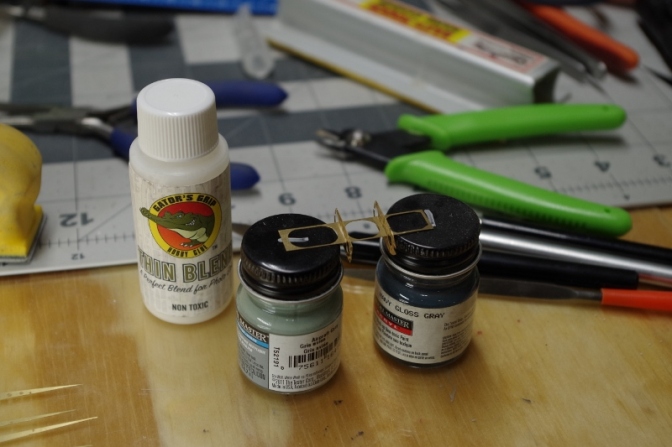
Most of the gluing at this point I’m doing with Gator’s Grip. It allows for re-positioning that CA would set too quickly for.
As I glue the shear braces in, I have temporarily placed the brass tubing of the periscope tubes in place to ensure that everything sets up and aligns correctly.
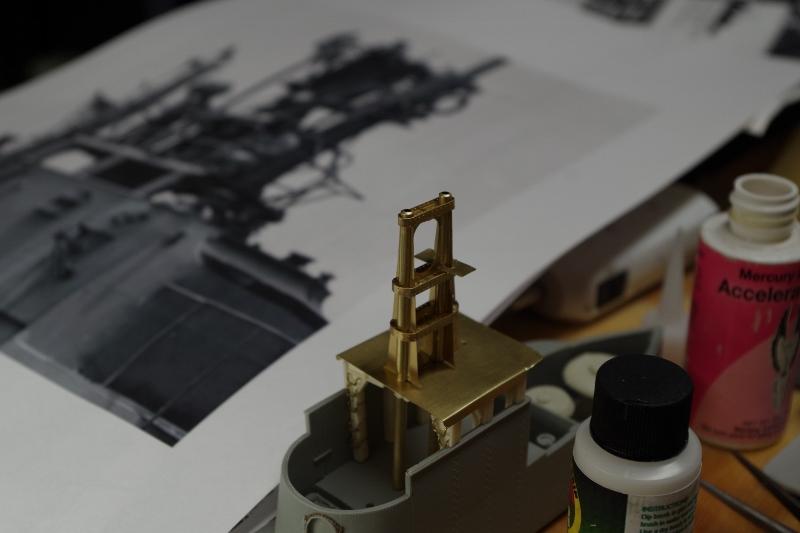
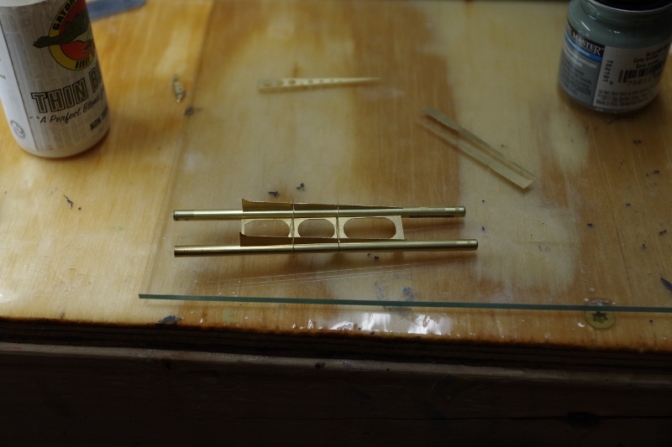 Once all of the outer frame is glued in, I install the assembly on the fairwater, and glue the frame to the periscope tubes.
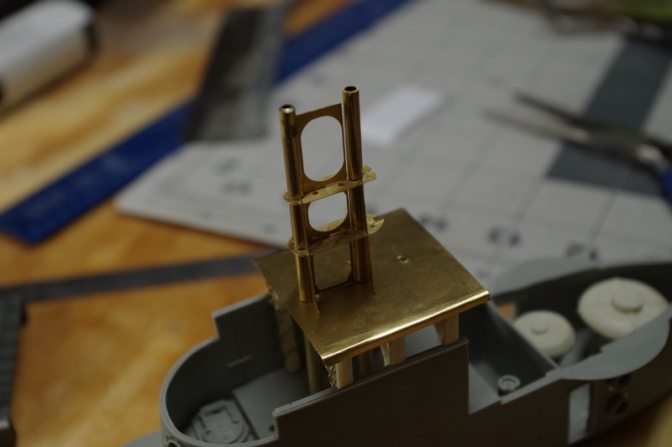
Bands are added to the cross braces, the top brace is installed, and per the pictures, I manufacture lookout perches on the aft periscope.
")
")
Okay, the Lapon’s covered wagon appears to be a solid sheet all the way across the top, tapered over the sides. This has been added to the model, and the next steps will be to add all of the radio mods the ship had at that time. The next blog entry will cover these modifications.
WOW you really go to town. I was lucky if I could get the basic pieces of the model to match up for gluing, and a couple of times I had pieces that were warped. I tried to straighten one out with a iron, got busted by my parents and was never allowed another model.