
Here's how I shoot infrared photographs on my smartphone

By: Tim Brookes (How-To Geek)
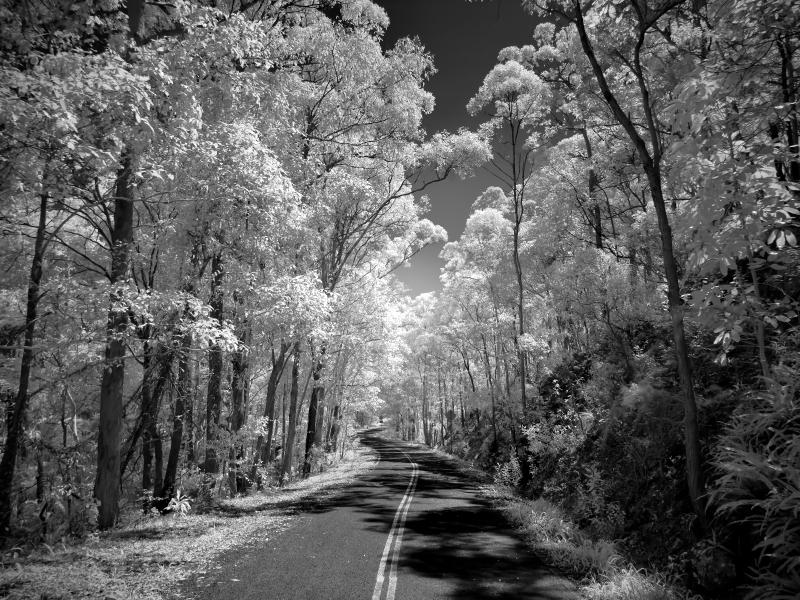

Something different to try with you phone camera. I suppose someone could still take infrared selfies, too. I've tried this with my Samsung phone and got good results.
 S E E D E D C O N T E N T
Infrared photography is a technique that involves capturing infrared light by blocking out all or some frequencies of visible light. The results are unique and otherworldly, and it's fun to see what the world around you looks like when you capture it in this way.
While you might think that you need a specially adapted camera to partake in this hobby, you might be surprised to hear that you can use a plain old unmodified smartphone, too.
Yes, you can shoot infrared with a phone
Most cameras filter out as much infrared light as possible using what is known as a "hot mirror filter" that sits in front of the sensor. Digital SLR, mirrorless, and point-and-shoot cameras use this to block the vast majority of infrared light, at least enough so that regular exposure times aren't too badly affected.
In order to effectively shoot infrared photographs with a regular camera, you need to perform what is known as an infrared conversion. This means opening up the camera and fully removing or replacing the hot mirror filter. It's a fiddly job, and there's a whole cottage industry dedicated to converting cameras (for a price).
Smartphones also use hot mirror filters, but these appear to be far less effective at blocking out infrared than those found on "real" cameras. This means that it's possible to shoot infrared photographs by blocking out the visible light spectrum using a filter that is placed over your lens.
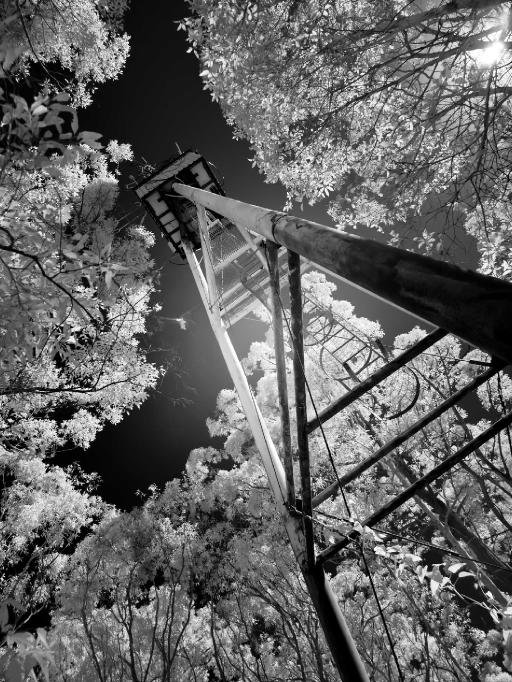
The images you see in this article were all shot on an iPhone 17 Pro with a 720nm filter. Due to the way Smart HDR works on iPhone, the images pop a little more on an Apple screen than they do on the web.
How I shoot infrared on my iPhone
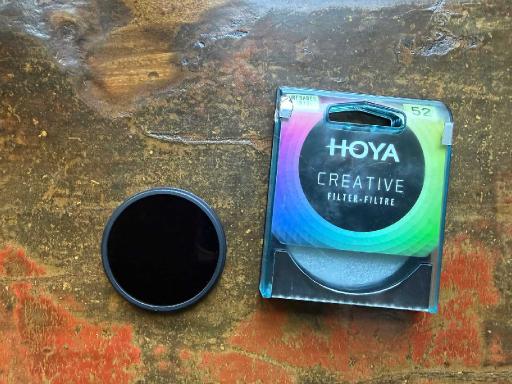
To shoot these photos, I used the simplest technique you can imagine. I took a 720nm HOYA 52mm infrared filter, held it over my iPhone's lens, and shot some pictures using the Apple Camera app. This technique should work for most smartphones, but there are a few pointers to keep in mind.
I used Apple's Camera app so that I could shoot in ProRAW at the highest possible resolution. The result is a bunch of massive 48MP DNG files that are each around 100MB in size. I'd recommend you move these to local storage and away from any cloud-based iCloud or Google Photos solutions you might be using.
Capturing in RAW gives you far more data to play with in post, which is particularly useful when you're trying to claw back detail in overblown highlights and under-exposed shadows. I also appreciated the high-resolution image since it allowed me to crop the image where necessary without losing too much quality.
My technique is far from perfect, and holding a filter in front of your iPhone is fiddly. If you don't get the filter flush with the lens bump, you're going to let in light around the edges, which will ruin the shot. It's also too easy to take what looks like a good shot only to later realize that your thumb is visible.
In a perfect world, you'd use a filter mount for your smartphone like something from Moment or SmallRig. Failing this, there are 3D printed mounts that I'm definitely going to be looking into for a more pleasant shooting experience. The size of the filter isn't hugely important; I picked 52mm as I have some other lenses I wanted to experiment with.
That said, if you're hoping to use your smartphone's ultrawide camera to shoot infrared photos, you might benefit from a larger filter. I found that the regular "wide" 1x camera yielded the best results, though all cameras seemed to have a "hot spot" near the center of the frame that registered slightly more infrared light. I tested this out, and it was definitely the camera and not the filter that was to blame.
Processing your infrared smartphone photos
The beauty of shooting infrared on your smartphone is that you get a pretty good idea of what the finished image will look like in the viewfinder. This allows you to hunt for interesting subjects simply by pointing and shooting. In darker conditions where there isn't a lot of infrared light, night mode (or whatever it's called on your particular model) can help.
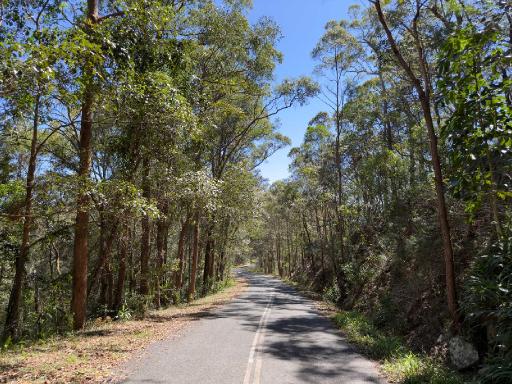
After a long day shooting infrared photos and filling up your smartphone's internal storage, you'll have a bunch of images that need to be processed. For comparison, here's what my iPhone sees without an infrared filter:
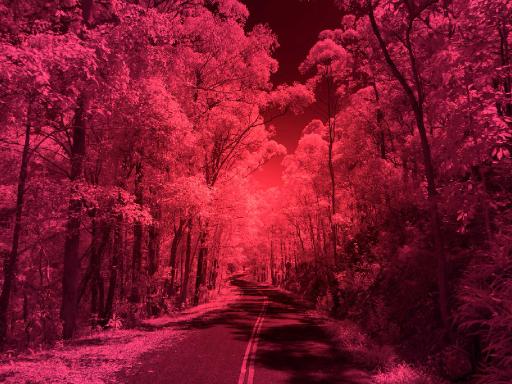
And here's what I get when I take a photo by holding the filter in front of my camera:
Finally, here's the finished shot after some processing:
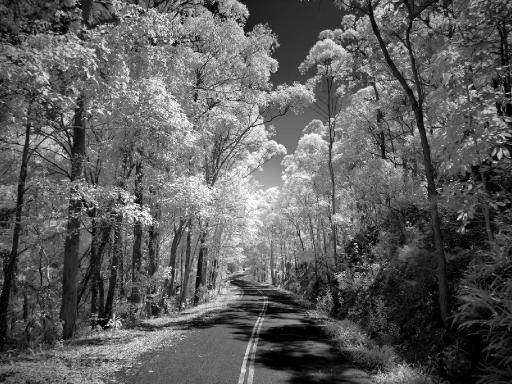
I've had great success processing photos directly on my iPhone. This is the most convenient and fastest way to work, and Apple's Photos app does a good job of processing the RAW (Snapseed is another good pick). Here's a quick workflow overview of how I got to this stage:
- Convert the photo to pure black and white by turning the saturation to 0.
- Tweak the shadows, highlights, and exposure to get the balance of the photo right. I usually reduce the highlights to tone down the brightest parts of the image and increase shadows to get more detail into the image.
- Turn the contrast up gradually to make the image pop again after "flattening" it using the shadows and highlights sliders.
- Make any final adjustments to the exposure, then turn up the black point slider until I'm happy with the sky and darkest areas of the image.
- Make any final tweaks to clarity, brilliance, and brightness depending on the scene.
- Consider adding some vignetting to the edge of the photo to draw the eye inward.
It's important to note that these are just suggestions, and they closely mimic how I edit regular photographs. For some exposures, I found myself doing the opposite and trying to make the highlights stand out even more by turning them up. Please break these "rules" and see what you can come up with.
Wondering which filter to buy? I was initially going to buy a no-brand filter from AliExpress, but opted for a HOYA filter since I found it for a reasonable $30 in a local camera shop. Any decent 720nm filter should be enough to start experimenting!
Be a good human. Grossly derogatory comments, blatantly inflammatory comments, excessive trolling, mean-spirited taunting and insults, scamming, spamming, and off topic comments may be removed in compliance with the site's Terms of Service and the Code of Conduct. The moderators have the final word.

I found that using the built in Black & White mode cuts down on the processing.
I don't have a filter holder so it's rather awkward to take photos. The results were interesting enough that I may invest in a rig specifically for infrared photography. And maybe some other photo filters, too. The big photo sellers (like B&H Photo and Adorama) carry a variety of gadgets for phones nowadays.
It is time for those Christmas wish lists.
I'll have to try this! I've made some of my photos appear like they were shot in infared before through photoshop editing, but I've never used a filter on a smart phone. ...now I wonder if my cpl filter would work in bright sunlight?
I use the phone to see if the remotes work.